"Resign yourself, Catherine! Shops must be visited! Money must be spent! Do you think you could bear it?" - Northanger Abbey

Monday, July 28, 2014

Romana the 2nds Pinafore

Yes I do have a kind of cosplay ADD...can't stop my mind from wandering onto the next project. I'll be sewing regency but thinking doctor who. lol!
Anyway my current cosplay idea is to make a Romana outfit. The first one that sprung to mind that I could gather together with mostly what was in my wardrobe was the one she wears in City of Death.
I have a suitable blazer I can sew a patch on. I can make the sweets badges. I have a suitable shirt and a strawboater. I just needed to make the pinafore and buy some red shoes and a red tie. Easy enough...or so I thought.

 First I draped the skirt. Two rectangular panels, pleated on the dress form. So far so good.
Then I tried to drape the bodice. This wasn't working. Fortunately I had just enough fabric left to make a bib style pinafore.
I found I had to raise the waistline slightly as the 'bib' wasn't quite as wide as it needed to be. I then had to make a few darts in the front bib to make it sit right and not gape stupidly.
I also added some tabs at the sides to help keep the sides from opening too much.
Next part of the costume is to modify the jacket, by sewing on 'patch' and making the badges.


Saturday, July 26, 2014

HSF 2014 - Challenge #14- Paisley & Plaid (Regency Shawl)

The Challenge: #14 Paisley & Plaid

Fabric: White 'Muslin' (openweave)

Pattern: N/A
Year: 1795-1800s Regency
Notions: Fabric Paint

How historically accurate is it? I used images of fashion plates to get an idea of the pattern placement. but the fabric paint isn't regency. lol!
Hours to complete: I'm not sure 2 hours perhaps? Had to let it dry.

First worn: N/A

Total cost: Cost, now that's tricky, I've lost the receipt. But the fabric paint was a couple of quid on sale and the muslin was what was left of my original 1790s dress I scrapped.

I did some reserch on pinterest and found many images or regency shawls with a paisley motif. This ones shape is based on the long rectangular shawls.

 I used the wood block I got at craft fair to print the paisley pattern. And used some ink stamps I'd found in local shop for the boarder.
The shawl itself was made from two long strips of muslin, finished with a rolled hem.
as you can see the dress still needs hemming.
 I debated adding more rows of paisley print but decided to go for just the two rows for now.


Tuesday, July 22, 2014

8th Doctor Cosplay - Version 2 - Part 2

So this is my 8th Doctor Cosplay without the coat. I'm not sure how to make the skirt more 'mottled' like the trousers?

I had a go at making the gaiters he wears.


Now the coat is a tricky one. I took the Beatrix jacket pattern and made it 10inches longer.

And now with the frock coat.

You can see my complete outfit above.


....as for the sonic I'll stick with my homemade one.

Wednesday, July 16, 2014

HSF 2014 - Challenge #13- Under $10 (Spencer)

The Challenge: #13 Under $10

Fabric: Unknown as it was 'gifted' to me. Scrap of brown lining.

Pattern: S&S spencer pattern
Year: 1800s Regency
Notions: bias binding, string, buttons

How historically accurate is it? I belive the pattern is accurate. Not sure about the materials as they were a bit of an unknown quantity.
Hours to complete: 25 hours approx

First worn: N/A

Total cost: Well the fabric was free, lining was scrap from another project and I've forgotten what I paid. Bias binding lost the reciept but its been in my stash over a year. String 99p. Buttons I think 50p each? So hoping that it came to around £5 mark, guessing at prices and illiminating cost of fashion fabric as I didn't pay for it.

 So I started by using the sense & sensibility pattern. The piping I made using some bias binding I found in my stash and some parcel string.
I had great difficulty getting the piping to go round the curves and points in the collar.

The sleeves took me a bit of figureing out. I messed up the straps to pull in the sleeve fullnes a bit. The inside of the bodice was faced and lined, all except the sleeves.
 I then added the hook and eye and decorative buttons down the front.

I intend to wear it with a plain white dress and a doctor who scarf...

Sunday, July 13, 2014

LFCC 2014 (Saturday)

So I decided to go to London film and comicon this year for the first time. I chose to only do one day and pay for earlybird and then prebook only 1 photoshoot so I wouldn't end up frazzled. I didn't end up doing everything I planned due to it being rediculously busy but I did get the important stuff done.
Started the day by getting to the station early enough to catch the train before the one I planned. Bonus. Also on we we bumped into two others going to the comicon...I ended up navigating everyone to earls court. lol!
Stepped out of the station to see the longest queue in the world with some poor chap having to shout out directions. We thought we heard prepay go round the corner. So trotted of gamely to find the end of the queue. So we walked and walked and walked till we were sure we'd just done a loop. Then finally there it was the end of the prepay queue...and only a handful of people in front. bingo!
Got hand stamped and headed inside...joined a queue (well its what you do at these things) to get the doctor who talk tickets. The queue didn't look that long (about 10-12metres)....yet it took 2 hours?! to get to the desk. I'm not sure how that's possible within the laws of phisics. But we had a good chat with those around us in the queue.
Got a chance to do a quick walk round before taking oppertunity for loo break and to buy a cold drink.

 Found the sherlock set and took some photo's, but it was roped off so no sitting on the couch. ;)
 Then we shuffled against the flow back towards the doors (as now standard entry was being let in). got my hand stamped again as by this time the original has sweated off. eep!
Took a breath of fresh air while looking at transformers props outside, before heading into EC1 for the sherlocked talk.
Met another Doctor Who cosplayer in the queue and spoke to the guy with wings (more on that later). The talk was first come first served but we quite by accident got quite close to the front of the queue.
The seat wasn't too bad. Various questions were asked most of which were answered with 'watch season four'. Moffat suggested it should be printed on t-shirts. We didn't win the autograph raffle but had to get back over to EC2 for the prebooked photoshoot with paul mcgann. It was a bit of a nightmare fighting through the crowds to get to to the photo area. We just made it in time and were ushered in quickly. I wasn't dissapointed. He is such a nice guy, even complimented my cosplay.
Shuffled back ooutside to find the prearranged dr who photoshoot. But no one was at meeting point. We thought we were too late.  Had a few mins to eat lunch. When someone came over and told us where there were others.
 There was even a war doctor cosplay there.
Then it was back over to EC1 for the cosplay masquerade. I wasn't sure where I was supposed to go, I just knew the stage was there so thought I would ask. Met few others who were waiting and turned out we needed to go to different area, fortunately we were quickly let to correct place and from then on it went smoothly.
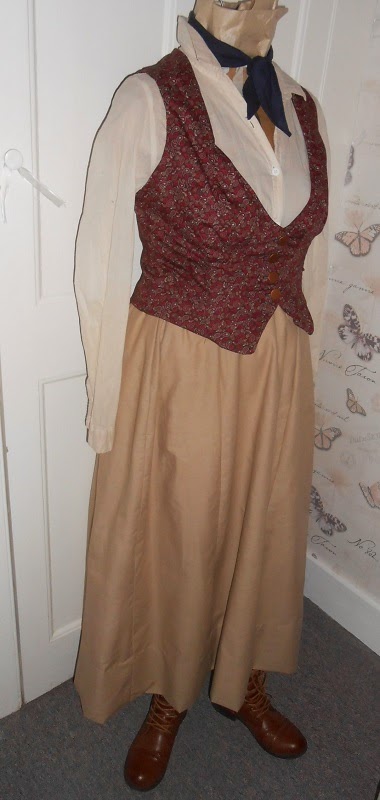
This was one of my favourite cosplays, looking at the various ones in the masquerade. I could see all the work that had gone into it. It looked like a film costume. Very jelous, wish I could get that fit and finish on my historic clothes. We had a great chat about historic costuming *waves* (I hope you've found the blog).
My other fave was this chap. The wings could open and close and looked realistic even up close. He even kept a sense of humour despite being unable to sit down with the wings on.
I didn't get to see all the entrants from backstage but all those entering had put lots of effort in to their costumes.
The doctor who talk was in the same stage area so was in a good position to queue up for it. It was really good and the two 'doctor's ' were funny when they started teasing moffat and discussing a musical doctor who episode. Now that I would like to see.
Then we went back to EC2 had last look around and got a cold-ish drink. Met the riddler...(it was that kind of a day).
Then headed back to the train station. We walked all the way round to the side with the TARDIS outside and met some cool Doctor Who Cosplayers who despite not being able to get into the excel due to it reaching capacity had spent the day by the TARDIS taking photo's and having a great time. There was a Timelord and a Silent guarding the box.
Then it was off back home. Tired sweaty and a little bit poorer. lol! I did enjoy it but I think I well do full weekend next time as it was too much to cram in one day.


Monday, July 7, 2014

Nautical Inspired Regency Ensemble - Planning

Just one of my many sketches.
So I got a notion into my head of making a regency naval inspired ensemble. I've spoken of it before here. But I've finally started collecting together materials and sketching out a few ideas.

- The bonnet has been started. Covered in black felt. I've got to line it then start trimming with gold braid and a cockade.
- I have bought a spencer pattern, blue velvet, gold braid, nautical buttons and white lining.
Still trying to decide on how much gold braid and whether to pipe the seams in white or gold.


- I have a sleeveless spencer 'waistcoat' to wear over dress but under the blue spencer.
- I am going to make a new dress from scratch. But should I go for blue with white piping, blue with gold piping. White with gold piping, white with blue piping. Blue with white sleeves and gold piping? Decisions decisions.
 In the two fashion plates above I note the blue spencer is paired with a white dress but....
 You get solid blue dresses.


 And two blue with white sleeves. I'm leaning towards the blue with white sleeves more as it goes with the 'uniform' look more.
Don't think I'll go as far as the gold lapels thought. Maybe a white and gold reticule?

Friday, July 4, 2014

Green 8th Doctor Coat

Sooo...I've not had much success with tailoring. Mainly because I just can't find/afford the right materials.
This time I was determined not to use it as an excuse I may be using non horsehair iron on/sew in interfacing but I was going to do all the right prep and no skimping on the pressing.
Took ages to cut out and interface the peices. First I did the collar making sure I trimmed the seams (but doh! forgot to understitch) and pressing. I also staystitched the neckline and armhole on the main peices -even though it wasn't suggested on the pattern instructions- as last time the neckline stretched.

 I basted the seamlines and tried it on the dress form and on me. It fitted ME better than the dress form...but I know that if something is snug on the dress form it will fit me close but with breathing space.
 I pinned on the sleeve and collar to see how it would look - obviously this is with seams on outside.
I was releived that it was long as I wanted it to be. As the original pattern just sits at wrong point on me so its more flattering with modifications.
 I basted in the collar but can you see my mistake? No? Well I didn't till I'd sewn it on the machine...the collar was the wrong way round so the interfaced side would show rather than the non interfaced. Ooops!
 You can see where I basted in the pleats for the vents then sewed them down on the machine.
 I basted in the sleeves. But there was just something not quite right....so I cut up some wadding and put it under the shoulders.
Still not right. I unpicked the basting and tried again.
This time it was further up the shoulder. Sewed it all in, clipped the seams and...
Spot the mistake....yep the sleeve seems don't match. The left arm and fine but the right one must have slipped round.
After much muttering under my breath and struggling with seam ripping I got the sleeves sorted.
Next was the lining. I added some secret inside pockets for carrying sonic screwdriver etc.

I slightly misunderstood the instructions...and attached the sleeves wrongly. So I had to bodge it a bit with some handsewing.
Then I sewed the hem. Next step is a good press and to find some buttons. It took me a while but I kept finding the right colour but wrong size, right size but wrong colour....fustrating. So I went for a compromise and got buttons that reflected the colour.
Here it is finally finished!
Oh, you wanted to see me wearing it...you'll have to wait to see it all together I'm afraid. ;)