"Resign yourself, Catherine! Shops must be visited! Money must be spent! Do you think you could bear it?" - Northanger Abbey

Wednesday, February 29, 2012

SImplicity 3847 Shirt - Part 4


I took the sleeves off and adjusted them to make them cap sleeves, so I didn't have to re cut them. (Quick thank you shout goes to MrsC at Hectic Eclectic for her helpful advice).
If I do this pattern again I shall use a sleeve pattern from another shirt. As the ones that came with this one have been a nightmare.
I have also marked out and made a start on the buttonholes. They take ages by hand don't they?
Will get back to them...just got distracted by the skirt. lol!

Tuesday, February 28, 2012

Simplicity 4044 - 1940's Retro Skirt

Review of Retro Skirt Pattern & Results
My Virtually Finished Skirt - just need hemming
So this is the first pattern I've managed to complete with no help! Really Pleased. It shall now become one of my staple patterns.
 First I bought my fabric. I saw it in the shop and just have to have it. Might buy some more and make a matching bolero jacket. The pink fabric is for another project.

Using the simplicity pattern. Quite simple to cut out. didn't get confused with the cutting layout this time as I ignored it and did it how it looked right as it was quite logical.
Stay stitched then put in darts and sewed the panels together.

Sewed the facing...which was a bit odd but quite stright forward.
From Outside

From Inside
Sewed my first zip...did it all by hand. Prefer zips to buttons so much quicker.
 Sewed on the facing it wasn't quite long enough one side but too long the other?
But then I'd sewn quite skinny seams so it might have thrown it out a bit.
 Took a bit of thought how to sew the facing on dip in the centre.
I know a bit scruffy but its on the inside.
 This is the centre front 'dip' not sure if I like it or not.

Finished all bar deciding on length and hemming it. It it come out pretty long. So I may have to cut some of my hard work to make it shorter before I hem it.
Overall though. Success!

Pattern Score: 9/10

Thursday, February 23, 2012

Knitting a shawl

So I found a pattern for knitting a type of shawl called a 'sontag'. It wraps round and ties behind. First saw it on BBC series 'lark rise to candleford' and thought 'ooh, I want one of those'.
I'm using a pattern off ravelry.com which uses circular needles in order to contain all the stitches. I've never done this type of knitting before I'm a scarf knitter really. So it will be learning process. I also had to learn to increase using knit front and back method....another new skill.
You just knit back and forth like normal. I chose a neutral grey wool.
There's a whole thing with 'slipping marker' which I wasn't quite sure about as didn't know where to place marker...in between the 2 stitches or on the loop of stitch itself. Went for in between stitches in the end.
As far as I got in one evening

Will keep you updated on my progress......

Saturday, February 18, 2012

Buttonholes, some practice

I'm going to have to do all my bottonholes by hand..so thought a little practice was in order. I've read a couple of different ways to do it so I tried a few.
 First I sewed the outline using doubled up thread, and single thread.
 Then used seam ripper to make button hole 'hole'. Putting pin in one end to stop the ripper from running away with itself.
 Then I tried using normal thread doubled up to sew buttonhole stitch. This didn't work very well. It kept getting tangled and took forever.
 So I then used embroidery thread. This worked much better.
I need to practice keeping it even next time. lol!

Friday, February 17, 2012

Knitting a 1940's snood

The Pattern says its originally from 1944 so I guess that makes it vintage. ;)
My method of casting on is...erm...novel, but self taught. I sort of worked it out and know its not correct but it does the job.
Its involved me learning what YO means (yarn over). And leading me on to learning how to do lace stitch.
I like how having holes - on purpose!- means it gets bigger quicker. I may have to knit more things with big holes. lol!
At one point I seemed to loose or gain a stitch I'm not sure which its hard to tell. All I knew is I couldn't start and end with K1 so I was a stitch out. So on the Purling row I just purled 2 together. Before you ask I can decrease but not sure how you increase stitches. That's what only ever knitting triangles and squares does.
I chose red because it was at the top of my craft box...I know there's some grey wool in there somewhere. But I've been known to knit with embroidery thread and ribbon when I've run out of wool before so don't be surprised I just went with what I had stashed. I probably need a less fluffy wool but this'll do for now.
SO finally finished it. Like how quick it went. Didn't understand the making up instructions so just experimented.
I think I shall make another one in thinner wool that matches my hair colour.

Tuesday, February 14, 2012

Victory rolls, hats, snoods and accessories

Yesterday I tried creating some victory rolls in my hair. For those who don't know what a victory roll is its not something you eat for lunch.


I used this tutorial.
It didn't fall out 5 seconds after I'd finished so that counts as a success in my view.
That got me thinking other than a hat how else to accessorize. I don't have a 'snood'. So I went searching online and was recommended some patterns on ravelry.

As I can't crochet I was aiming for knitted pattern. This one stood out to me.
http://www.knitting-and.com/knitting/patterns/hair/snood.htm
I've not done lace stitch knitting before but....'how hard can it be?' 
There are plenty of videos on youtube giving instructions.
Now...where did I put my knitting stuff?


Monday, February 13, 2012

While I'm wrestling with shirt sleeves..here's a hat

You all know...well you should know I can sew hats, bags and quilts in my sleep. To quote someone from a sewing forum 'quilts *always* fit'. And as I'm testing my brain power to try to get the sleeves to work on my shirt (It's definitely the sleeves, I managed to find half an inch each side seam and now the body of the shirt fits nicely but as soon as sleeves are added I have trouble.) I decided to make something simple....to reassure me I can actually sew.
So I chose to do this hat. I used up more of that green material (its never ending it seems...but I paid a lot for it I'm going to use it....and it is nice to sew with, I'm just not keen on the colour.)


I decided to make a little bow with some off cuts to make it more feminine. Might look nice with a 40's suit (in gabardine)? It fits me but sits on the back of the head rather than more forward as I like my winter hats to do (keeping your ears warm) so might be a summer hat. I also added some loops of embroidery thread (in green so not easily noticeable) so that I can use bobby pins to secure the hat more easily. What do you think?

Wednesday, February 8, 2012

Simplicity 3847 - the shirt - part 3

I shall now bring you up to date on this project.
Sleeve
First I sewed the sleeve as per instructions. It said to hem the 'cuff' before attaching to armhole.
I eased the sleevehead pinning it in place....
Pinning sleeve in armhole
Then sewed both sleeves....
sleeve from top

Now here is the complete shirt..well almost complete buttonholes still to be done.
front

Front (inside out)

Back (inside out)
Back
I have a little problem. When trying it on I found my arm movement was severely restricted. If I tried to lift arms up and 90 degrees the armband dug into my arm. Thus I seem to be stuck with arms at my side with it. I cut the pattern accurately and followed the instructions. 
sleeve shown inside out


Why is it not working?
Is there adjustments that need to be made....what are they?
To me it seemed like they needed to be wider at the armband....is this assumption correct?

Tuesday, February 7, 2012

Some purchases

Well I couldn't go the whole day there without buying something...
So I have some more patterns
The blouse is like the blouses I buy, waiscoat as an intro to tailoring, the tunic dress as could make good 20's dress, and last dress coz it looked like it could pass for retro.

Also bough some lovely buttons
And some more needles, pins and a seam ripper (I lost the other one down side of the sofa).


Monday, February 6, 2012

Creative Stitches at Bluewater - A review

Went to creative stitches & hobbycraft at bluewater weekend just gone. It was my first time at an event like that so I wasn't sure what to expect. It was essentially a big marketplace with 'stalls either selling stuff or promoting guilds etc. I have to say I enjoyed it and would have liked to have stayed longer...although I think that may have led to spending a fortune on fabric and haberdashery. lol!

I found the hobby craft section didn't appeal to me...seemed to consist of mainly 'papercraft'. But I liked the creative stitches section. And looking around at the various items on display its given me inspiration for some of my own projects. Particularly the quilts.
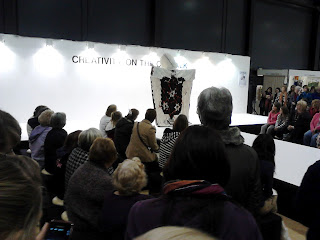
There was a 'fashion show' too.


There were some outfits from the show Downton Abbey on display.

Looking at them up close you could really see the detail and effort that must have gone into them.

There was also some lace being made and a display of different regions lace.
There was also a wool coat. (the Newbury Coat) Bet that is cosy to wear in the winter.
All in all I enjoyed it bought some patterns and got some fabulous buttons. Wish I'd have brought more money to get some fabric as well....although how I could choose with such a wide selection. lol!