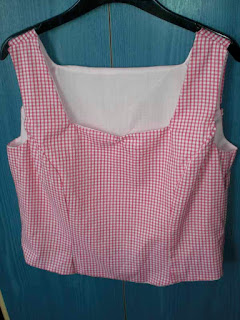
As I have done most of the bodice - as I'm making it into a dress - I thought I'd review it so far. One thing I need to point out is I usually prefer simplicity patterns for their 'simplicity'. I find them easy to follow compared to others, but this time round I was disappointed. The instructions for the bodice were very confusing. As it referred to back front without clarifying if it was the lining or the fashion fabric.
This led to a few mistakes which I had to fix. So lets point out the problems and solutions. I did I admit end up with my own vague interpretation of the instructions.
First off I pinned all the lining together and sewed it up...only to realize later that what I needed to do was (after unpicking one side) just sew the curved back bits to the main back, and the curved front bits to the front. This needs to be done separately on the lining and fashion fabric.
Then put right side of fashion fabric to right side of lining. Back section to back section, front to front.
Then sew long armholes, straps and neckline ONLY on both front and back. Then you can turn straps inside out and press. The next bit is clear enough in the instructions.
Its all ready now for me to add the zip. Which I won't do till I attach the skirt which has now been cut out. I went for the pattern accompanying skirt. But will be making it sit a little higher and tried to be generous with the cutting.
Update:
I cut out the skirt to find right in the middle the fabric was threadbare an a small patch. Grrr! Now I'm going to have to buy more material and re-cut the skirt. Which means delays again.
Update 2:
So...I decided to make it as a bodice on its own just like original pattern...well apart from the sweetheart neckline.
 |
| adapted neckline |
 |
| zip |
 |
| back |
 |
| front finished |


No comments:
Post a Comment